Akashnet a decentralized cloud of future Setup Guide
Akashnet is A decentralized cloud for hosting your apps, censorship-free

Senior Software Engineer working remotely with Infosys. Love to write blogs and share code in my free time. Editor and Blogger tekraze.com. Crypto Enthusiast and gamer.
So, we will be sharing how to set up Akashnet and what is akashnet. So basically, it is “The world’s first decentralized open-source cloud, and DeCloud for Defi.”
Akashnet works on the principle of the decentralized or distributed network where we run our application in parts, like for example DB at one place, the app at one place, file storage at one place. But the traditional system requires us to configure different instances, different configurations and connect to them which is complex and time-consuming.
So, where comes Akashnet is, this provides a single window for doing all this and doing all the complex stuff behind the scenes for managing the decentralized network. You can visit the given official site below for more info:
Let us see how we can setup akashnet in steps
Note: All these steps will be done in a Linux environment. We prefer ubuntu for the same.
Note: We use export to temporary set environment variables, whereas you can also set up variables with a file for persistence
1. Choosing a Network
There are basically 3 networks, where we can connect to use Akash services. The 3 available networks are
- testnet
- mainnet
- edgenet
So, basically, the network is the server where Akash APIs are deployed for providing the functionality. And bases on the name, testnet is for anyone wanting to test the Akash before going to production, with mainnet, which is a production-ready network.
Note: testnet provides free tokens without real money whereas mainnet uses real money for buying tokens. Edgenet also works as a testnet but is under maintenance at the time of writing this doc.
So, first, we need to choose the network for downloading specific configurations as environment variables. Enter below command as per network choice, for setting the parent path for the Akash git repo with configuration.
Mainnet
export AKASH_NET="https://raw.githubusercontent.com/ovrclk/net/master/mainnet"
Testnet
export AKASH_NET="https://raw.githubusercontent.com/ovrclk/net/master/testnet"
Edgenet
export AKASH_NET="https://raw.githubusercontent.com/ovrclk/net/master/edgenet"
We will be using testnet for further guide. So do use testnet.
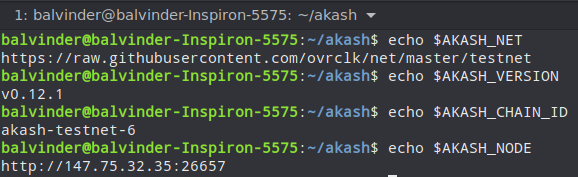
Let set up the required configuration environment variables from the selected network
a) Akash Version
Enter the command to set Akash version(the binary version of Akash executable we will use for commands)
export AKASH_VERSION="$(curl -s "$AKASH_NET/version.txt")"
b) Chain Id
Enter the command to set chain id(a basic identification of cluster within testnet to choose from as there may be updated on a different chain)
export AKASH_CHAIN_ID="$(curl -s "$AKASH_NET/chain-id.txt")"
c) Genesis
Enter the command to set Genesis data as a file (Data regarding providers, accounts, and more to be used for testing)
curl -s "$AKASH_NET/genesis.json" > genesis.json
d) RPC Nodes
Enter the command to set RPC node (A random node IP, in case of multiple RPC nodes, else the one can be directly set)
export AKASH_NODE="$(curl -s "$AKASH_NET/rpc-nodes.txt" | shuf -n 1)"
Check all variables by Echo
2. Installing Akash Executable
If you prefer old school, download the latest releases from the release page and export them to your system path.
Or, use a new downloader by go (As Akash is a built with go language)
curl https://raw.githubusercontent.com/ovrclk/akash/master/godownloader.sh | sh -s -- "$AKASH_VERSION"

This will download the Akash binary in your current directory under the bin folder.
Note: export the path of the akash to use without changing directory. We will be using bin/akash to execute commands from $PWD.
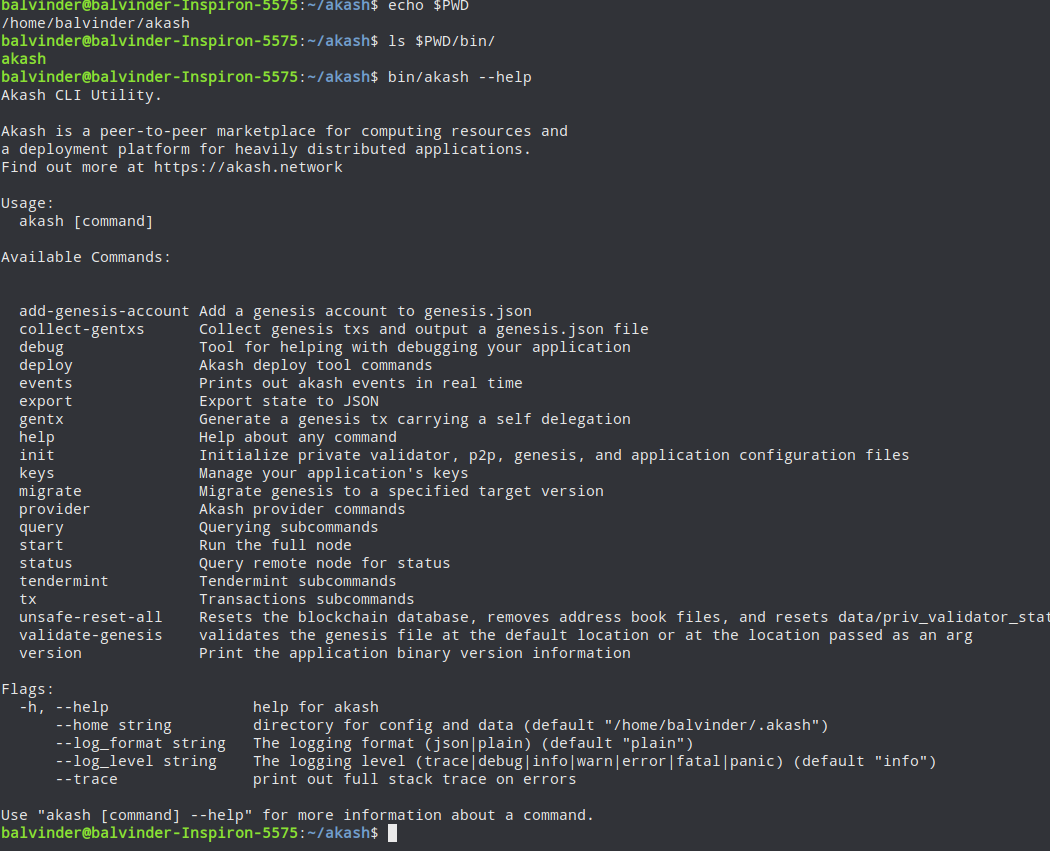
check the image to confirm Akash is working.
3. Setup a Wallet
Akashnet uses crypto AKT coins for all its operations, so we need to set up a wallet before we can do any further actions. Let us set up the wallet
a) Set Key name variable
Enter the command to set a key name choice like ex MYKEY, deploykey, or any recognizable text. We will use the name dehazelabs for current examples.
export AKASH_KEY_NAME=dehazelabs
b) Set Keyring backend
Keyring backend is used to store the key for your wallet. The key values can be either one of:
- os (default)
- file
- test
We will be using test for our example.
export AKASH_KEYRING_BACKEND=test
Verify both variables with echo
echo $AKASH_KEY_NAME $AKASH_KEYRING_BACKEND
dehazelabs test
c) Generate a key
Enter the below command to generate the key
bin/akash --keyring-backend "$AKASH_KEYRING_BACKEND" keys add "$AKASH_KEY_NAME"
Output of same
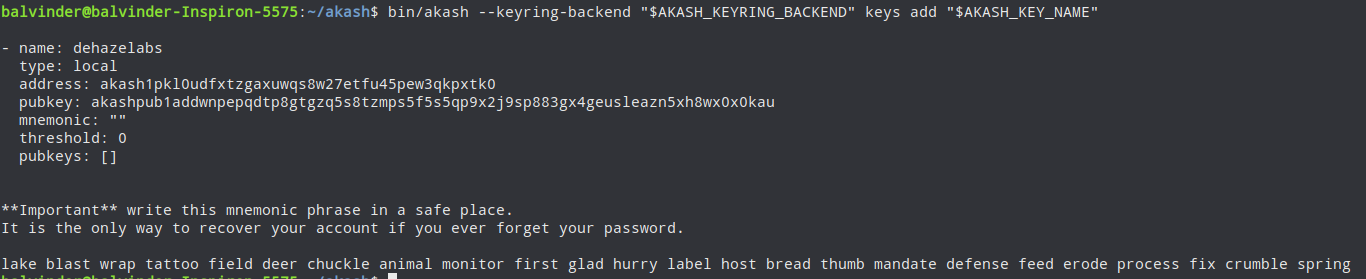
The above image shows keyname, address, and passphrase to unlock
The value akash1pkl0udfxtzgaxuwqs8w27etfu45pew3qkpxtk0 is the address of your wallet. You can use this address to do transactions over the Akash network.
d) Set Address Variable.
The above-created wallet address, we can set as an environment variable to reuse later. Enter below command for setting address from direct value (replace with your key value)
export AKASH_ACCOUNT_ADDRESS=akash1pkl0udfxtzgaxuwqs8w27etfu45pew3qkpxtk0
if you need to find the address again by key name, enter the below command
bin/akash --keyring-backend "$AKASH_KEYRING_BACKEND" keys show "$AKASH_KEY_NAME" -a
4. Fund your wallet
There are currently two ways to fund the wallet.
- Faucet (only for non-mainnet)
- Coins Exchange Link
As we are using testnet we can use Faucet to fund our wallet.
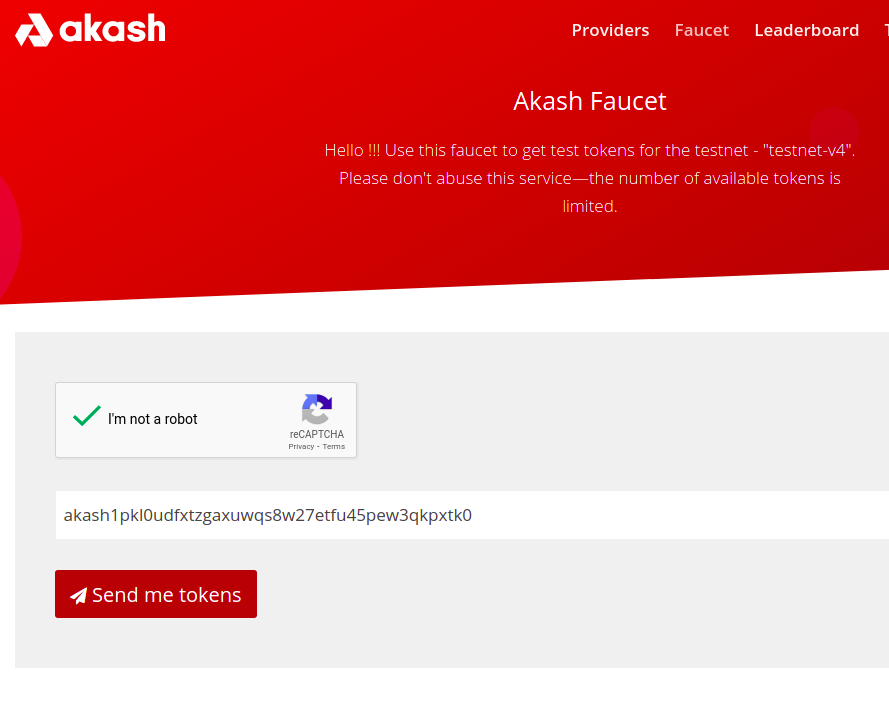
Enter the below command to get the URL of the faucet for our selected network and chain id.
curl "$AKASH_NET/faucet-url.txt"
https://akash.vitwit.com/faucet
Visit the URL and enter your wallet address, which we created in the previous step.
Verify the balance after some time with the below command.
bin/akash --node "$AKASH_NODE" query bank balances "$AKASH_ACCOUNT_ADDRESS"

Now you are ready for using the Akash network. Next, we will see how to become a provider and app deployment. We will share in the next part about further steps to do.